
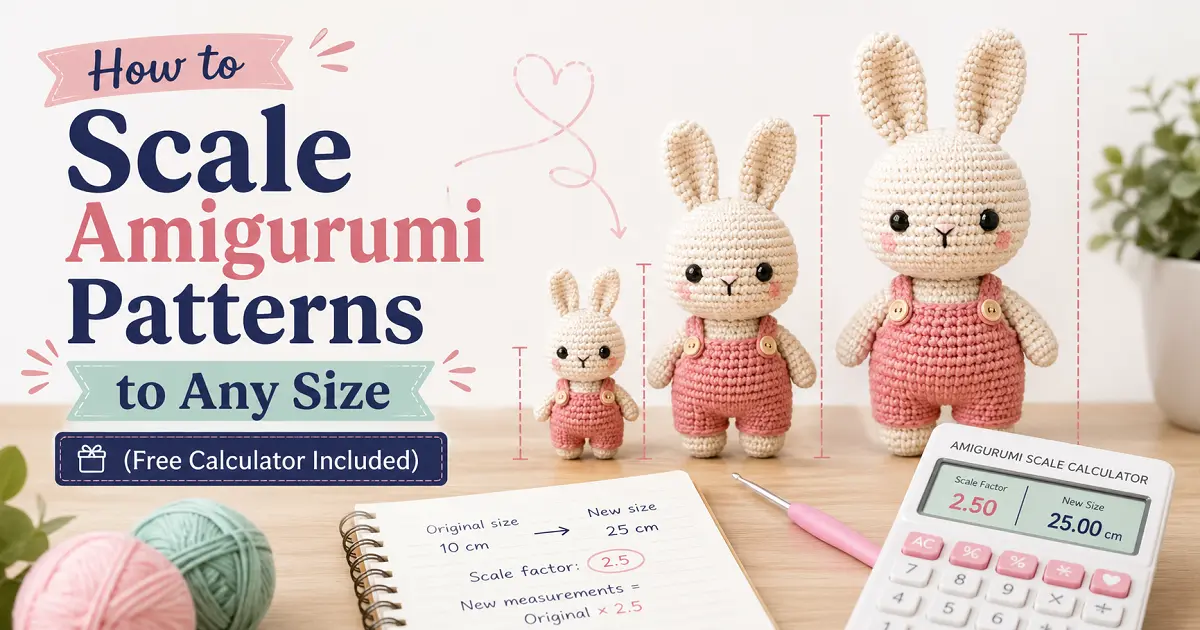
You found the perfect amigurumi pattern — but it’s going to come out too small for a gift, or too large for a keychain. Sound familiar? In this guide I’ll show you exactly how to scale any amigurumi pattern up or down using gauge math, plus how to use our free Amigurumi Size Scaler tool to do all the calculations in seconds.
Why Gauge Is the Secret to Resizing Amigurumi
Most crocheters know that gauge matters for garments — but fewer realize it’s just as important for amigurumi, for a slightly different reason. With a sweater, you match gauge so the finished size fits a body. With amigurumi, you use gauge to control finished size intentionally — making the same pattern come out bigger or smaller depending on what you want.
Gauge is simply the number of stitches and rows you get per 4 inches (10 cm) of crocheted fabric. Two crocheters working the same pattern with the same yarn can get completely different results if their natural tension differs — or if they deliberately choose a different yarn weight or hook size.
Here’s the core principle: if your gauge is tighter than the pattern’s gauge (more stitches per 4″), your finished amigurumi will be smaller. If your gauge is looser (fewer stitches per 4″), it’ll be larger. By understanding this relationship, you can predict and control the final size before you crochet a single stitch.
In amigurumi, unlike garments, you don’t have to match the designer’s gauge exactly. What matters most is that your fabric is dense enough that stuffing doesn’t poke through. Once you’ve got a tight, consistent fabric, you can use gauge math to hit your target size.
The Two Main Methods for Scaling Amigurumi
There are two approaches to making an amigurumi pattern bigger or smaller. The right one depends on how much you want to change the size and how much math you’re comfortable with.
Method 1: Change the Yarn Weight (No Math Needed)
The simplest approach is to swap the yarn for a heavier or lighter weight and adjust your hook to match. Since thicker yarn creates bigger stitches, the finished amigurumi will be proportionally larger — using the exact same pattern, stitch for stitch. To make it bigger, go up a yarn weight. To shrink it, go down a weight.
This is beginner-friendly but gives you limited control over the exact size. You’re working in jumps — worsted to bulky, for example — rather than fine-tuning to a specific measurement.
Method 2: Calculate a Gauge Ratio (Precise Control)
For more precise sizing — especially when you have a specific target size in mind, or when you’re working with a yarn you already own — use gauge math to recalculate the stitch counts in each round. This is what our Amigurumi Size Scaler tool does automatically.
The formula is straightforward: divide the pattern’s stitch gauge by your actual stitch gauge to get your scale factor. Then multiply every stitch count in the pattern by that factor to get your adjusted numbers. Our tool handles all of this for you — but understanding the math helps you trust the results.
If you want to make a quick size-up or size-down without thinking too hard, go with Method 1 (change yarn weight). If you have a target size in mind, or you’re working with a specific yarn you already own, use Method 2 with our calculator.
Common Amigurumi Gauge Reference Chart
Use this chart as a starting point when choosing yarn and hook for your desired finished size. Your actual gauge may vary based on your personal tension — always crochet a quick swatch to confirm before scaling a full pattern.
| Yarn Weight | Typical Hook | Sts per 4″ (approx.) | Relative Size |
|---|---|---|---|
| Fingering / Thread (1) | 1.5–2.0 mm | 22–26 sts | Tiny / Keychain |
| Sport / Baby (2) | 2.0–2.75 mm | 20–24 sts | Small |
| DK / Light Worsted (3) | 3.0–3.5 mm | 17–20 sts | Small–Medium |
| Worsted (4) — most common | 3.5–4.5 mm | 14–18 sts | Standard |
| Bulky (5) | 5.0–6.0 mm | 11–14 sts | Large |
| Super Bulky (6) | 6.0–9.0 mm | 8–11 sts | Extra Large |
| Jumbo / Blanket (7) | 9.0 mm + | 6–9 sts | Giant / Plush |
Note: these are general starting points. Always go 1–2 hook sizes smaller than your yarn band recommends for amigurumi, so your fabric stays tight enough to hide the stuffing.
Free Amigurumi Size Scaler Tool
Enter your pattern gauge, your actual gauge, and your stitch counts — get perfectly scaled numbers in seconds. No math required.
How to Use the Amigurumi Size Scaler (Step by Step)
Here’s a complete walkthrough of using the tool. You only need two things before you start: your pattern’s listed gauge, and your own gauge from a small swatch.
Crochet a small gauge swatch
Chain 15–20 stitches and work 10–15 rows in single crochet using the yarn and hook you plan to use. Then measure how many stitches and rows you get across 4 inches (10 cm). This is your gauge. It only takes about 10 minutes and it’s the most important step — your whole scaled pattern depends on it.
Find your pattern’s gauge
Look at the top of your pattern — most patterns list a gauge in the materials section. It’ll say something like “18 sc = 4 inches using 4.0 mm hook.” Write this down. If your pattern doesn’t list a gauge, you can estimate it by crocheting the first few rounds with the recommended hook and measuring the result.
Choose a Quick Start preset (optional)
The tool has one-click presets for common amigurumi setups — Fingering, Sport, DK, Worsted, and Bulky — which load the typical gauge for each yarn weight and pre-fill 9 rounds of a standard sphere pattern. This is great if you’re starting from scratch or just want to explore sizes.
Enter both gauges in the tool
Type the pattern’s stitch and row gauge into the “Pattern Gauge” fields, then type your own gauge into the “Your Gauge” fields. You can also select the hook sizes for each — the tool will note if your hook is a good match or suggest going up or down a size.
Enter your stitch counts and click Scale
Type the stitch count for each round from your pattern into the table rows. Label them anything you like — “Round 1,” “Head,” “Body Round 4.” Add as many rows as your pattern has. Then click Scale My Pattern and the tool instantly shows you the adjusted stitch count for every single round.
Check the size comparison (optional)
If you know the original finished dimensions of the amigurumi (width and height in centimeters), enter them in the optional fields. The tool will show you a visual bar chart comparing the original size to your scaled size, so you can see exactly how big your finished piece will be.
A Real Worked Example
Let me walk through a real scenario so you can see exactly how the math works — and how the tool handles it.
The situation: You found a cute bear pattern designed for worsted weight yarn with a 4.0 mm hook. The pattern gauge is 18 stitches per 4 inches. You want to make a miniature keychain version using fingering weight yarn with a 2.0 mm hook. Your gauge swatch gave you 24 stitches per 4 inches.
Round 1 (6 sts) → 6 ÷ 1.33 = 5 sts
Round 2 (12 sts) → 12 ÷ 1.33 = 9 sts
Round 3 (18 sts) → 18 ÷ 1.33 = 14 sts
Round 4 (24 sts) → 24 ÷ 1.33 = 18 sts
The tool does all of this automatically for every single round in your pattern, and also flags the percentage change for each row so you can spot if any round looks off before you start crocheting.
If your scaled count gives you 13.4 stitches, round to 12 or 14 — the nearest multiple of 6 works best for the standard amigurumi increase system. A difference of 1–2 stitches won’t visibly change your finished size.
Pro Tips: What Else Changes When You Scale
Stitch counts aren’t the only thing that needs adjusting when you scale an amigurumi. Here are the details that make the difference between a scaled pattern that looks right and one that looks off.
- Safety eye sizes scale proportionally. If the original uses 10 mm safety eyes and you’re making the pattern 1.5× bigger, look for 15 mm eyes. Going much larger? 18–20 mm eyes work well for jumbo plushies. Proportional eyes are what keep amigurumi looking cute rather than creepy.
- Stuffing scales by volume, not area. A piece that’s 50% larger in width and height is actually much more than 50% larger in volume — it’s closer to 2–3 times more stuffing. Always buy more polyfill than you think you’ll need when scaling up significantly.
- Large amigurumi may need wire armature. Pieces scaled to more than about 1.3× the original size can struggle to hold their shape, especially in the legs and arms. A simple pipe cleaner or craft wire skeleton inside the limbs lets your amigurumi stand and pose without flopping over.
- Yarn quantity scales up fast. A rough estimate: multiply the original yardage by the square of your scale factor. If your piece is 1.5× bigger, you’ll need roughly 1.5² = 2.25× as much yarn. Always buy a little extra to be safe.
- Feature placement needs adjusting for large pieces. On bigger amigurumi, eyes placed at the same round as the original can look too close together. Try placing them slightly further apart, or one or two rounds lower on the head, to maintain the same cute proportions.
- Go down 1–2 hook sizes for amigurumi density. Whatever hook the yarn label recommends, use a size or two smaller. This tightens your stitches so stuffing can’t poke through — which is especially important when you’re scaling down and working with finer yarn.
Ready to Scale Your Pattern?
Our free tool handles all the gauge math and gives you a complete scaled stitch count table in seconds.
Frequently Asked Questions
No — unlike garments, amigurumi don’t have to match a designer’s exact gauge. The two priorities for amigurumi gauge are: (1) your fabric is tight enough that stuffing won’t show through, and (2) you understand what size your finished piece will be at your gauge. Our scaler tool handles the second part for you.
Yes! This is one of the best things about amigurumi. Using crochet thread and a 1.5 mm hook, you can shrink a standard pattern down to a keychain. Using jumbo blanket yarn and a 10 mm+ hook, you can turn the same pattern into a giant floor pillow. The stitch count stays the same — only the yarn weight and hook change.
Round to the nearest multiple of 6. Most amigurumi sphere patterns increase by 6 stitches per round, so keeping your counts in multiples of 6 makes the increase math cleaner. A difference of 1–2 stitches from the calculated number won’t noticeably affect the shape or size of your finished amigurumi.
A rough rule: multiply the original yardage by the square of your linear scale factor. For example, if your amigurumi will be 1.5 times bigger, expect to need about 1.5² = 2.25 times more yarn. This is an estimate — always buy an extra skein as a buffer, since running out mid-project with a discontinued colorway is heartbreaking.
This is the part that confuses most people! If your gauge is tighter (more stitches per 4″), each of your individual stitches is physically smaller. So to cover the same area and reach the same finished size, you actually need more stitches — not fewer. The tool correctly increases your stitch counts to compensate for your smaller individual stitch size.
Quick Summary
Scaling amigurumi comes down to understanding one relationship: the ratio between the pattern’s gauge and your gauge determines your finished size. A tighter gauge = smaller finished piece (needs more stitches to compensate). A looser gauge = larger finished piece (needs fewer stitches). Our free Amigurumi Size Scaler tool does all of this math automatically — you just enter your gauges and stitch counts, and it gives you a complete scaled pattern in seconds. Don’t forget to also adjust your safety eye sizes, stuffing amounts, and yarn yardage when scaling significantly.